7 Steps to Properly Repair the Electric Fence Energizer
- Share
- Issue Time
- Nov 2,2021
Summary
If the electric fence energizer fails, the electric fence won’t operate normally. Let's talk about the steps to repair the electric fence energizer.

The electric fence energizer is a device that obtains electric energy from an external power source (110V socket or battery) and then pushes the energy out through the positive fence terminal with a very short high voltage and high ampere pulse. The negative ground terminal absorbs any excess pulse energy back to the exciter. When the electric fence fails, we need to follow these steps to repair it accordingly.
Check with the Tester
It’s good to check the energizer first so that you do not waste money in buying a replacement if it's not needed. Turn off the energizer, and disconnect the fence from it. Then, connect it to an electric fence tester to see it gets any readings.
If there isn't any, the problem could be a corroded terminal, AC circuit breaker, dead batteries, or a blown input circuit fuse. In the event that you are strapped for cash, you can try simple solutions like cleaning the terminals or replacing the batteries before you replace the entire device.
Check Fence Surroundings
Before assuming that your charger has gone bad, walk about the length of the fence and check for trouble spots. Any downed or broken wire or loose debris hanging off the fencing can all ground the current, rendering the fence useless. Troubling spots on the fence must be repaired or cleaned up first before attempting to replace the energizer.
Put Safety First
Always make sure that safety comes first. Unplug the source of electricity to your electric fence, and disconnect the ground wires that feed into your controller box. If something should happen and an electric current runs back into the wires, you’ll avoid getting shocked.
Disconnect the Hot Wire
Take your screwdriver and loosen the hot wire’s nuts from the mounting screw on the fence energizer unit. Push away the wire from the hot bolt and put back the nut.
Replace Energizer Unit
Unscrew any support or mount brackets from the fence or wall. Scrutinize the mounts for signs of wear such as rust and/or missing screws. Clean away rust and grab some replacement screws, if needed, before reinstalling.
Now, take the new energizer unit and place it back into the charger. Place the brackets back on to secure the unit.
Reverse Process Installation
Doing the reverse of what was done previously, attach the hot wire to the new charger; then, attach the ground wire with the electricity still turned off.
Turn Fence Back On
Reconnect the energizer to the fence and do a careful inspection to make sure everything is squared away. Look out for any signs of electric surge or burnouts, and be sensitive to any flashes of electricity or flames that could spark. Also, keep your nose working to sniff out a burnt smell coming from the fence or the area around the fence. If you encounter any of these things, disconnect the energizer again immediately and work to find and fix the problem.
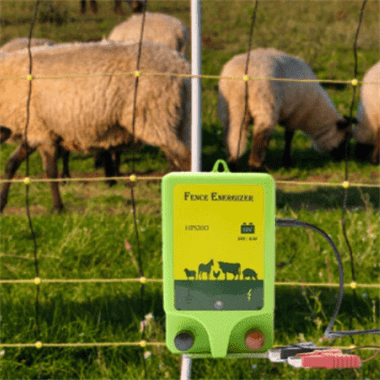
The electric fence energizer provided by HPS fence is easy to operate and install and is suitable for short-distance electric fences up to 5 kilometers. If you want to know the relevant product information, you can get a comprehensive solution by contacting us.
As an experienced manufacturer of electric fence products, HPS Fence focuses on providing professional technical solutions for small electric farms and home backyards. We can provide customers with sufficient product inventory to ensure customers' order requirements and timely delivery. We have established a comprehensive quality inspection system to control the quality of our products. If you are interested in our electric fence energizer, please contact us immediately!